When it comes to installing new marble window sills, the foundation plays an important part. If the foundation of a window frame isn’t correct, then your marble window sills will not be installed properly. Improper installation of marble window sills can result in water leakage that can cause damage to your property. To avoid wasting money on repairs from improper window sill installation, find out what the best method is for installing marble window sills.
First off, our experts at STONEXCHANGE recommend that you have a margin trowel or afloat on hand at all times. Grabbing this important tool now will save you a great deal of grief later on. In many cases, it’s not possible to properly install a piece of marble without one.
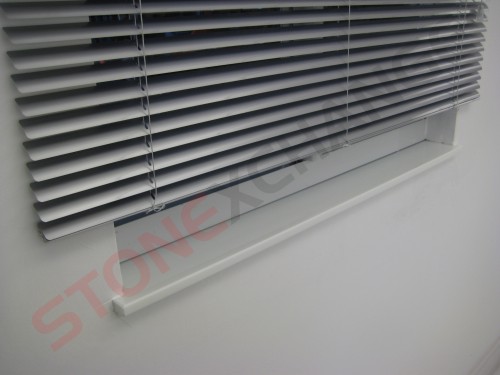
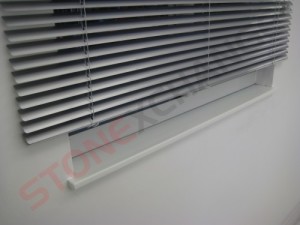
Preparing the Window Sill for Installation
For new builds, this will be easy as the entire structure is new and everything is being built from the ground up anyway. But for replacing an old sill with a marble window sill, first thing’s first. You’ll have to do demolition to the existing window. After the demo, use a chisel to get rid of any extra residue that’s hanging around after the trim removal. This will help with the base of the window frame.
Making Sure the Surface is Leveled and Smooth
This is where you need to make sure the base surface is perfectly level. Here, a leveling ruler will come in handy. This process might be a bit tedious, but it is also one of the most important steps. It is highly advised that you proceed with patience. Otherwise, rushing this process might result in a faulty installation.
If the base is not completely leveled, then the marble window sill will not be properly secured and can most likely be easily moved. This is something you don’t want. If the base surface is not leveled, you will have to use a leveling mortar to create a flat and even surface. This typically takes about a day for the mortar to dry out. Once it dries, it’s recommended to check your levels again as the settling mortar may have been affected.
Marble is a beautiful stone. It would be a shame to install it with speckles of mortar plastered on it. That is why the edges of the window sill should have a neat look. In order to accomplish this, the base surface should be straight and right-angled.
Determining What You’re Working With
First, you’ll have to inspect the material around the window sill, and that would be the wall. You need to determine if the walls surrounding the window frame are made of brick, concrete, or timber frames. This is crucial when preparing your window frame for marble window sill installation. If the walls are made of concrete or bricks, then you need to make sure that the base of the surface is completely flat. There can be not any slanting; otherwise, the marble window sill will not lay flat. It must be level. As aforementioned, use a leveling measurement to determine if this is so.
To make sure that your marble window sill sticks to the brick or concrete, it is recommended to use a good cement-based adhesive. You can find this at your local home improvement store. While you might be surprised to learn how affordable this compound is, you’ll want to take a moment to read the label fully before you invest a few dollars into getting a pail of it.
Manufacturers usually rate their adhesives for use with marble, and you certainly don’t want to use something that isn’t right for the job. The wrong compound might not hold or could even react with the piece of stone you’re working with. This is an absolute nightmare that someone would have to deal with in the distant future, so it’s best to simply avoid it right now.
Be sure to check out any instructions related to ventilation as well. You’ll usually want to make sure that you have plenty of access to fresh air before you even think of opening the tub.
Now, if the walls are made of timber frames, this is handled a bit differently. You’ll need to use different materials. Here, you’ll need to make sure that both the marble sill and the wooden base are perfectly clean. Dust particles and other residue need to be completely removed so they won’t get locked in with the adhesive because this will weaken the bond between the wood and marble. It might sound a bit strange, but you should also make sure to clean away any insects before you do this. Flies are often attracted to windows. If you’re doing a restoration or remodeling job in an older home, then there’s a good chance that there are insects and cobwebs at the bottom of the glass.
Experienced installers are usually familiar with how different materials interact with one another. If you’re using an adhesive for the very first time, then you’ll probably want to apply a small amount to the underside of the windowsill just to make sure that there aren’t any adverse effects before you start to apply it properly.
Making Sure Your Window Sills are the Right Size
While most marble window sills come in standard sizes, there is a possibility that you may have to adjust the size of yours, depending on the building designer’s architectural choice. If you find that you need to adjust the length of your marble window sill, you’ll need to use a wet saw or a grinder that has a diamond blade. If you don’t have experience working with power tools, there are other options. You can either hire professionals to cut it for you or order pre-cut window sills. You could also order custom cut window sills from a wholesale distributor. Keep in mind that some window sill distributors might require an additional lead time to process special orders.
Determining the Lip on Your Window Sill
Here’s where you can get creative. As marble window sills come in three standard sizes ranging from 36″, 56″, and 74″, the depth of it can be as wide as 3″ – 12″. If you are going for a more decorative approach, the 12″ would be more eye-catching, but for practical purposes like the windows in a shower stall might benefit from a 3″ width.
Do Different Material Types Matter?
One question that we often get is whether or not different types of material need to be installed in a different way. The good news is that once you’ve mastered installing one type of marble, you’ll be able to install any type without giving it any further thought. On the other hand, you’ll want to make sure that you’re working with the right piece of material for the job.
In many cases, you’ll even be able to replace an expensive piece of stone with a less expensive but high-quality substitute. For instance, say you had to install Thassos marble windowsills that featured very little in the way of water absorbency. You could just as easily opt for Pure White Thasoz engineered stone. It works every bit as well and offers interior designers the same characteristics when it comes to water absorption. However, it doesn’t cost nearly as much.
Where to Find Good Marble Window Sills
To get the best price on quality marble window sills, find a wholesale distributor that specializes in selling marble window sills only. Most marble tile distributor may offer marble window sills as an addition to the floor tiling. Stonexchange, located in Miami, Florida offers seven of the most sought after marble selections in the market. View their online catalog here.
Stonexchange is a wholesale distributor offering discount prices for quality marble window sills and thresholds in bulk orders. With us, the more you buy, the cheaper the unit price will be.
We have a large clientele base. So if you prefer to hire a professional to install your marble window sills, our customer service department can refer you to one of our clients in your area as we ship our products nationwide. Contact us today so you can speak with one of our experienced customer service representatives. They’ll take the time to find solutions that meet your specific needs.
Browse Our Catalog >>>